How do you change a file type
Author: s | 2025-04-23
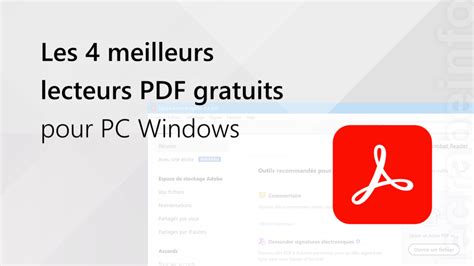
In this article, we will guide you through the process of changing file types in Windows 10, including how to do it in the File Explorer, how to change file types using the How do you change the type of a file? To change the file type, open the document, on File menu, click Save Send. From center pane, click Change File Type and from right
How do you change a file type - Microsoft Community
2:31 4:10 And then you just hit save and then when you go to the documents. Or wherever you saved it bake theMoreAnd then you just hit save and then when you go to the documents. Or wherever you saved it bake the recipe right here. And you can see that now its saved as a PDF. How to Change any Document into a PDF File - YouTube youtube.com watch youtube.com watch How do you convert a document to a PDF? How to convert a Word document to a PDF: Open the file in Microsoft Word. Convert Word document to PDF: On Windows, click the Acrobat tab, then click Create PDF. Protect PDF: Save as PDF file: How do I convert my file to PDF? How Do I Convert My Documents to a PDF? The recommended way to create a PDF is to save your document as a PDF. Best way to create an ideal PDF is, Click FILE. SAVE AS Name the document. Change the Save as Type to PDF. Click SAVE. You will now have a PDF version of your document. How Do I Convert My Documents to a PDF? - eFile zendesk.com en-us articles zendesk.com en-us articles How do I convert a step file to PDF? STEP to PDF online converter Upload STEP file to convert. Allowed file types: dwg, dwf, dxf, plt, hpgl, hpgl2, plo, cgm, step, stp, vsd. Set converting STEP to PDF options. Convert to. PDF. JPEG. TIFF. CGM. PNG. HPGL. Options. Header Footer. Header: Footer: Get converted file. How do I make a 3D PDF from a step file? 0:38 1:51 And then we can change the type of output format to use a template design in an a3 page engineeringMoreAnd then we can change the type of output format to use a In this article, we will guide you through the process of changing file types in Windows 10, including how to do it in the File Explorer, how to change file types using the File type.Step 5: Then you will see a list of file types supported by Windows 10 and their associated applications on the right-hand side.Tip: There will be a gray plus sign (+) icon if the file type does not have a particular application to handle it.Step 6: You are supposed to scroll through the list to find the file type you want to change the file associations for. For instance, the target is the GIF FILE in this picture. You should click Photo located behind.Step 7: Choose your preferred application from the list that appears and click its icon.In the case of some file types, there will be multiple options, whereas others may have none.Here, taking Paint for an example, you are supposed to hit Paint.Now, you have learned how to change the type of files successfully in Windows Settings.Solution 2: Change File Associations via the Control PanelYou can also change file associations via the Control Panel, just as the followings.Step 1: Open the Control Panel. You can press “Win + R”, type “control” and hit OK to open it.Step 2: Hit Programs.Step 3: After hitting Programs, you will see this interface. Hit Default Programs.Step 4: Now, select Associate a file type or protocol with a program.After finishing the whole steps, you will see the interface of Windows settings. You should change file associations like you do in Windows settings.Solution 3: Change File Associations in File ExplorerYou have two options to change file associations in File Explorer.Option 1: Choose anther appStep 1: You can press “Win + E” to open the File Explorer.Step 2: Find your target file from the left panel, and right-click it. Supposing that the circled picture is your target, you should right-click it.Step 3: After right-clicking your target, you are supposed to scroll down your mouse to the Open with, and choose the option of Choose another app.Step 4: Now, if you want to associate the target with Paint, you should hit Paint. Do not remember that checking the box next to Always use this app to open.png files. Then hit OK.Option 2: Use propertiesYou could also change file associations by another way in File Explorer.Step 1: Right-click the target file, and hit Properties.Step 2: Click the option of Change.You have learned some solutions to change file associations. They are efficient and quite simple, aren’t they?Most operations of changing file associations in Windows 11 are exactlyComments
2:31 4:10 And then you just hit save and then when you go to the documents. Or wherever you saved it bake theMoreAnd then you just hit save and then when you go to the documents. Or wherever you saved it bake the recipe right here. And you can see that now its saved as a PDF. How to Change any Document into a PDF File - YouTube youtube.com watch youtube.com watch How do you convert a document to a PDF? How to convert a Word document to a PDF: Open the file in Microsoft Word. Convert Word document to PDF: On Windows, click the Acrobat tab, then click Create PDF. Protect PDF: Save as PDF file: How do I convert my file to PDF? How Do I Convert My Documents to a PDF? The recommended way to create a PDF is to save your document as a PDF. Best way to create an ideal PDF is, Click FILE. SAVE AS Name the document. Change the Save as Type to PDF. Click SAVE. You will now have a PDF version of your document. How Do I Convert My Documents to a PDF? - eFile zendesk.com en-us articles zendesk.com en-us articles How do I convert a step file to PDF? STEP to PDF online converter Upload STEP file to convert. Allowed file types: dwg, dwf, dxf, plt, hpgl, hpgl2, plo, cgm, step, stp, vsd. Set converting STEP to PDF options. Convert to. PDF. JPEG. TIFF. CGM. PNG. HPGL. Options. Header Footer. Header: Footer: Get converted file. How do I make a 3D PDF from a step file? 0:38 1:51 And then we can change the type of output format to use a template design in an a3 page engineeringMoreAnd then we can change the type of output format to use a
2025-04-06File type.Step 5: Then you will see a list of file types supported by Windows 10 and their associated applications on the right-hand side.Tip: There will be a gray plus sign (+) icon if the file type does not have a particular application to handle it.Step 6: You are supposed to scroll through the list to find the file type you want to change the file associations for. For instance, the target is the GIF FILE in this picture. You should click Photo located behind.Step 7: Choose your preferred application from the list that appears and click its icon.In the case of some file types, there will be multiple options, whereas others may have none.Here, taking Paint for an example, you are supposed to hit Paint.Now, you have learned how to change the type of files successfully in Windows Settings.Solution 2: Change File Associations via the Control PanelYou can also change file associations via the Control Panel, just as the followings.Step 1: Open the Control Panel. You can press “Win + R”, type “control” and hit OK to open it.Step 2: Hit Programs.Step 3: After hitting Programs, you will see this interface. Hit Default Programs.Step 4: Now, select Associate a file type or protocol with a program.After finishing the whole steps, you will see the interface of Windows settings. You should change file associations like you do in Windows settings.Solution 3: Change File Associations in File ExplorerYou have two options to change file associations in File Explorer.Option 1: Choose anther appStep 1: You can press “Win + E” to open the File Explorer.Step 2: Find your target file from the left panel, and right-click it. Supposing that the circled picture is your target, you should right-click it.Step 3: After right-clicking your target, you are supposed to scroll down your mouse to the Open with, and choose the option of Choose another app.Step 4: Now, if you want to associate the target with Paint, you should hit Paint. Do not remember that checking the box next to Always use this app to open.png files. Then hit OK.Option 2: Use propertiesYou could also change file associations by another way in File Explorer.Step 1: Right-click the target file, and hit Properties.Step 2: Click the option of Change.You have learned some solutions to change file associations. They are efficient and quite simple, aren’t they?Most operations of changing file associations in Windows 11 are exactly
2025-04-08Type the following, but change *.jpg to be whatever it is you want your files to have: ren *.* *.jpgThis command will rename everything in this folder. Make sure you're in the correct folder, and want to change the file extension for every file in there. If you only need to rename a group of similar file extensions, you can modify the command slightly. Here's what to type if you want to make all the GIF files have the JPG file extension (everything else will be left untouched): ren *.gif *.jpg Press Enter. All of the file extensions will change automatically. Convert the File to Change the File Type A file conversion tool can change the file extension, too. The primary reason you'd do this is if you want to change the actual file format (i.e., file type), like if you need the file to be compatible with a specific device or software program. Here's an example where we're using the Zamzar file converter to change the file extension of an audio file from MP3 to WAV. Visit Zamzar, and select Choose Files. Select the MP3 file you want to change to WAV, and then press Open. Select Convert To, and then pick WAV from the list. Select Convert Now to start the file conversion. Choose Download to save the file to your device. Some software programs have built-in file conversion tools. This is often the case for programs that can open several file types. Adobe Photoshop, for example, can open a PNG file and convert it to over a dozen other image formats, which then changes the file extension (to JPG, GIF, TIFF, etc.). What Does Changing the File Extension Do? The Windows operating system uses the file extension to understand how to open a file. For example, when you double-click to open a TXT file, Notepad probably opens it. This happens because Notepad is configured to open TXT files. If I changed the TXT file to the DOCX file extension, Microsoft Word would open it instead because my PC is configured to use Word for that file type. Reasons to Change the File Extension One reason to change a file extension is if the original one was appended to the file by mistake. This sometimes happens when a file is downloaded from a website. If you were supposed to get a PDF file, for example, but the web service exported your file to something else, you can change the file extension to PDF to make it work correctly with your PDF reader. Another example is if you're working with a BAT file. Building it as a TXT document makes more sense, so you can quickly double-click to open it in a text editor when you need to make changes. But when you're done, you have to change the file extension to BAT to work as intended. You might think about changing the file extension to make the file work with a different program or device. For example, changing
2025-04-21Been moved to the Settings app in more recent versions of Windows 10.Working with File Extension OptionsThis section will discuss how to work with file extension options in Windows 10. We will cover two main sub-sections: enabling and interacting with extensions.Enabling File ExtensionsTo change a file’s extension in Windows 10, you first need to enable file extensions to be visible. To do this, follow these steps:Open a File Explorer window.Click on the “View” tab in the ribbon bar at the top of the window.Locate the “Options” button on the right-hand side of the ribbon bar, and click on it.In the “Folder Options” window that appears, navigate to the “View” tab.Find the “Hide extensions for known file types” checkbox and uncheck it.Click “OK” to save your changes.Now, you should be able to see the file extensions in File Explorer.Interacting with File ExtensionsOnce you’ve enabled file extensions, you can change them by following these steps:Locate the file whose extension you wish to change in File Explorer.Right-click the file and choose “Rename.”Remove the current file extension in the editable name field (the characters after the “.” dot in the file name).Type the new file extension you want to assign to the file.Press “Enter” to confirm the change. You may see a warning about changing the file extension, click “Yes” if you want to proceed.Remember to be cautious when changing file extensions, as doing so might render the file unusable. Always ensure you know the correct file extension for the type you want to assign.Selecting the FileTo change the file type in Windows 10, you need to locate the file you want to change. Press Windows + E to open the File Explorer and navigate to the folder containing the file.Renaming File ExtensionBefore renaming the file extension, make sure the extensions are visible. Go to the View tab in File Explorer, and click Options. Select Change folder and search options.In the Folder Options window, switch to the View tab. Remove the checkmark next to Hide extensions for known file types. Click Apply, then click OK.Now that extensions are visible, right-click the file you want to change the type of, and select Rename. Change the extension, such as from “.txt” to “.jpg,” and press Enter. A warning may appear informing you that changing the file extension may cause the file to become unusable. If you’re sure you want to change the file type, click Yes.Please
2025-04-09A hotsync folder. You can shift from one computer to another and continue to work where you left off. Example Files that you want to continue to update and work on over time, like text files and spreadsheets, are always accessible and updated. Here's how to use the most common advanced CloudMe features. How do I add a sync folder? Open CloudMe on your computer. Click "Add a sync folder" In the "Local Folders" view, Select a folder to sync it with from your computer's local drive In the "CloudMe Folders" view, Select a folder to sync from your CloudMe account's Cloud Drive Click "OK" and a sync folder has now been created All new sync folders are by default a Bidirectional sync (see below) Right-click on the added sync folder and choose Sync Folder Now to sync it immediately How do I change a sync folder's type? To change a folder's sync type: Click "View sync folders" Select a sync folder Click on the radio button in front of the sync type you wish If you choose Upload, Download or Bidirectional the change is made immediately(the arrows on the folder will update to reflect your choice) If you choose Hotsync, click "Yes" to confirm (the color of the folder will change to red) How do I download a Favorite? Open CloudMe on your computer. Click "Add a sync folder" In the "Local Folders" view, Select a folder to sync it with from your computer's local drive In the "CloudMe Folders" view, Select a folder to sync from your CloudMe account's Favorites Click "OK" and a Favorite sync folder has now been created Right-click on the added Favorite folder and choose Sync Folder Now to download immediately How do I change the Sync Schedule? Click on Application Settings, the cogwheel in the upper right corner of the CloudMe window Under Scheduler, Check the "Use scheduler" box Select Daily or Weekly as well as which time and/or day to sync. At any time, you can press the Sync Now button to sync all your folders immediately. How are conflicts settled? To settle conflicts: Click "View sync folders" Select a folder, right-click and move the mouse to Conflict Type to: Backup - Make a backup of conflicting files Overwrite - Overwrite conflicting files (Your CloudMe account file is always used as the original) Ignore - If in conflict the file will not
2025-04-20What to KnowTo change a file extension in File Explorer, first go to View > Show > File name extensions.Then, right-click the file, select Properties, change the file extension, and press OK > Yes.Use the ren Command Prompt command to change the file extension for several files at once. This article explains how to change the file extension of a file in Windows 11. It also discusses the difference between file extension and file type. Change a File Extension the Easy Way For most people, the easiest way to change a file extension in Windows 11 is to do so from the same place you change the file name. However, Windows doesn't show file extensions by default, so we must first make a small change to that before we're given the option to edit the file extension. Open File Explorer. A quick method is to use the WIN+E keyboard shortcut. Select View at the top of the window, followed by Show > File name extensions. Now that Windows 11 displays file extensions, right-click the file you want to edit the extension for and choose Properties. If you're in a hurry, left-click the file once (don't open it), press F2, edit the file extension, press Enter, and then select Save. In the General tab, rename the characters after the period to change the file extension. Press OK, and then Yes, to save. Changing the file extension does not change the file type. See the bottom of this page for more on that. Change a File Extension From Command Prompt If you're familiar with Command Prompt, you might prefer to use the rename/ren command to change a file extension. This method lets you skip having to edit the File Explorer options (i.e., you can keep file extensions hidden, and this will still work). Open Command Prompt. Change to the directory where your file is located. For example, if Command Prompt opens to C:\Users\jonfi, but the file is on your desktop, type this into Command Prompt: cd C:\Users\jonfi\Desktop Type ren followed by the original file and then the new name for the file. Here's an example where I'm changing the file extension from DOCX to TXT: ren file.docx file.txt Press Enter to immediately change the file extension. How to Change File Extensions in Bulk Command Prompt also makes it super easy to edit the file extension for multiple files simultaneously, assuming they're in the same folder. The trick is using asterisks so you don't have to call out any specific file by name. Put all the files you want to edit into their own folder. Right-click an empty area next to the files, and select Open in Terminal. Confirm that Command Prompt shows the correct folder. In my example, it says C:\files>. If PowerShell opens instead, press Ctrl+Shift+2 to get to Command Prompt. Learn more about Terminal if you need help.Don't breeze through this step. If you're in the wrong folder, there's no easy way to undo the command you're about to perform.
2025-04-04